

bdo, code and abbr tags in HTML are some sort of html secret tags, but they are very useful tags. <code> tag is used to specify a piece/fragment of computer code. <bdo> tag is used to specify the direction of the text and <abbr> tag is used to specify an abbreviation. Let’s understand these tags one by one in detail to have a very clear understanding.
HTML code tag :-
<code>: This is a container tag which specifies piece/fragment of computer code inside the HTML document.- The content inside the code tag is by default displayed in monospace font family by the web browsers.
- Also, if anyone searches for the code related query, SEO will look for the code tag inside the pages and display the page having code tag very quickly, improving the rank of that page and consuming less search time.
For Example :
<!DOCTYPE html>
<html>
<body>
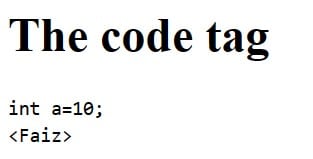
<h1>The code tag</h1>
<code>int a=10;</code>
<br>
<code><Faiz></code>
</body>
</html>
Output :
HTML bdo tag :-
<bdo>: BDO stands for Bi-direction Override. This also is a container tag which specifies the direction of the text or is used to override the direction of thee text.- It has one attribute dir which is used to override the direction of the text. It’s by default value is “ltr” i.e. left to right.
- It is mainly used for writing the text in the languages which flows from right to left such as arabic, urdu, etc.
- bdo tag is used to create the mirror images too.
For Example :
<!DOCTYPE html>
<html>
<body>
<h1>The bdo tag</h1>

<bdo dir="ltr">My name is Faiz</bdo>
<br>
<bdo dir="rtl">My name is Faiz</bdo>

</body>
</html>
Output :

HTML abbr tag :-
<abbr>: This container tag specifies or represent an abbreviation or an acronym.- It has one attribute title through which we can specify the full form of the abbreviation.
- When the user hovers over the abbreviation enclosed in the abbr tag, the full form given in the title attribute is displayed.
For Example :
<!DOCTYPE html>
<html>
<body>

<h1>The abbr tag</h1>

<abbr title="Hyper Text Markup language">HTML</abbr>

</body>
</html>
Output :

Note :-
Watch HTML bdo code and abbr tags on YouTube – Click here
Types of HTML Elements – Click here
HTML Favicons – click here
Will be covering more such tags in the upcoming days. So stay tuned for updates and to know more about such tags.